Category Archives: Glass Coating

How Much Does It Cost To Fix A Broken Window?

The Cost of a Broken Window

A broken window can leave your home exposed to the elements and exposed to risk of a break in. Replacing or repairing a broken window as soon as possible will help keep the cold of winter at bay and improve the security of your home. This applies whether is it the glass that is broken, or if it’s the frame or seals that requires repair.

In this post, we’ll go over the average cost of fixing a broken window, how to save money and even how to undertake some DIY repairs yourself.

Finally, we’ll answer a few of your frequently asked questions.

The cost to repair a standard window with no special glass requirement ranges between $250-$400.

How Can I Repair or Fix a Broken Window while Saving Money?

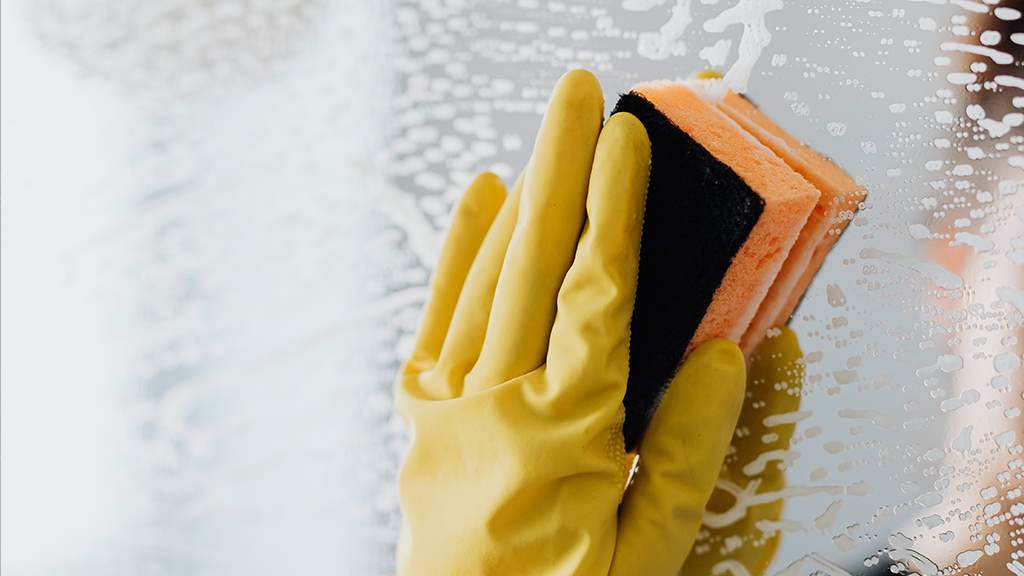
You can fix minor scratches on your window’s glass by yourself. You’ll just need some cerium oxide glass polish and a strong felt or leather buffing pad.

Don’t delay. Make an appointment as soon as you notice an issue with your window frame or glass. Delays can cause the repair to turn into an emergency, adding additional costs.

Lastly, check that the problem isn’t the window lock. Replacing that instead of the frame can save you money.

Sometimes, however, you just need a professional glazier. If so, contact Economy Glass.

Do I need to Repair or Replace my Broken Window?

Broken Glass

Scratches

As we’ve already mentioned, you may take care of minor scratches yourself. However, if the scratch is large, get in touch with an expert because the glass may need to be replaced.

Draughts

If you feel a draught when the window is closed, it may be because the seal has rotted. It will need to be replaced.

Blown Windows

If your window frame has a gap between the glass panes, moisture will get in between the panes and cause misting.

 
Broken Glass

You will need to replace your window if the glass is broken rather than scratched.

Broken Window Bars

If the window bars between each pane are broken, you will need to replace your window.

Window bars keep the glass panes in place. If they are broken, the glass can crack and fall out.

Window Seals or Gasket Failure

If your gasket or seals have failed, there may be an issue with the frame, or the seals may have worn out. Condensation and mould can also weaken the seals.

Rotten Timber Frames

If the timber frame is rotten or the uPVC is discolouring, water will enter via the rotting or warped frame from the outside, and damp issues may result. Additionally, security is compromised because the frame may be easily broken into.

What’s Involved in Repairing or Replace Broken Window?

Generally, window repairs involve:

  • Glass
  • Site Survey
  • Labour
How to fit a new pane of glass. given that you have a measured, new piece of glass to fit.
  • You must first take out any broken glass from the window frame.
  • Put on safety gloves, and beginning at the top, gently knock out any remaining glass with a hammer.
  • With a chisel, remove all the old putty, brushing away any dust and dirt.
  • Add new putty into the window rebate. Use your thumb and firmly press it in.
  • The putty should be around three millimetres in thickness.
  • Place the new pane of glass at the bottom of the frame now. Push the glass into the putty after working around the edges.
  • Place glazing panel pins flat against the surface of the windowpane at intervals of around 200mm to secure the glass.
  • Add more putty, pushing it along the edge of the window rebate. With the use of a putty knife, carefully apply the putty to the desired location.
  • To create a flat surface, wet the putty knife and smooth over the putty. Make sure to also smooth the putty in the angles of the frame.
  • Leave to cure for about two weeks. You can paint the window frame after this time.
How Can I Locate and Hire a Glazing Company in Western Suburbs?

Start by asking family, friends, and work colleagues. A good referral is invaluable.

Conduct an internet search and choose a glass company near you. 

You can also contact Economy Glass for quality glass products, glass repair & replacement services in Melbourne.  Economy Glass is an expert glass company with years of experience in glass installation and repairs, serving WERRIBEE and Melbourne’s Western Suburbs.

5 Outstanding Glass Splashback Ideas for Your Bathroom Renovation

Are you looking for a bathroom renovation? Then start with bathroom splashbacks. Besides its functional purpose of protecting your bathroom walls from water splashes, a splashback will completely transform your bathroom aesthetics and ambiance.

splashback
For Your Bathroom Renovation, Here Are 5 Amazing Glass Splashback Ideas

Available in a variety of materials including tiles, acrylic, glass, stone, stainless steel, laminate, and more. You should carefully consider the advantages and disadvantages of each option before choosing.

In this article, we’ll be focusing on glass splashbacks as they offer greater value for money in terms of customizability, elegance, long-term durability, hygiene, and ease of maintenance.

Can a Splashback Be Used in a Bathroom?

Definitely! Shower enclosures, bath surrounds, and the space behind the sink in the bathroom are all examples of where you can use a bathroom glass splashback.

Besides the instant luxury glass automatically adds to your bathroom, glass splashbacks also offer greater hygiene and easy-cleaning maintenance due to the grout-free surface, which efficiently stops the accumulation of mildew, mould, and soap scum, making cleaning a snap. Glass splashbacks ensure the longevity of its luxury finish, in addition to being hard-wearing and moisture-resistant.

Thanks to modern digital printing technologies, glass splashbacks are now easily personalized to cater to individual colour and design preferences. Whatever colour, design, or custom image you wish your bathroom glass splashback to feature, all you need to do is make a choice.

Do Baths Need a Splashback? Installing a glass feature wall around your bath similarly protects your bathroom interiors from the rigours of your bath time while generating an ambiance that is conducive to your personal relaxation and me time. A glass splashback shields your shower walls from moisture, water, and heat damage.

It’s incredible what a pop of color or calming images of the ocean will do for your state of mind and emotional well-being. Imagine relaxing in a warm, comforting bath as your body, mind, and tired muscles are consumed by another time and place.

Is a Glass Splashback Cheaper Than Tiles? It’s all relative. In terms of pure monetary cost, tiles are definitely less expensive than glass. But if you weigh the pros – longevity, luxury finish, easy-cleaning maintenance, hygiene, and higher tolerance to heat, water, and moisture – then glass splashbacks will provide you with much better long-term value for your money.

Glass splashbacks cost more than tiles do for a variety of reasons:

Toughened glass is used in glass splashbacks for increased durability and greater heat and moisture tolerance.

Glass splashbacks are fitted as a single glass panel, which makes cleaning them much easier than tile splashbacks, which tend to collect soap scum, mould, and mildew in the grouting.

The fact that tiles are fitted in smaller portions than glass splashbacks, requires specialized knowledge. And equipment for a safe and effective installation, also makes them easier to manage.

Bathroom glass splashbacks are waterproof and will maintain a luxurious look for many years.

While glass splashbacks might cost more to install, their clear advantages offer a greater return on investment in the long term compared to tiles. Modern bathroom glass splashbacks are also available in unlimited color and design options, besides being completely customizable. Simply ad it’s a more cost-efficient solution.

5 Outstanding Bathroom Glass Splashback Ideas In need of inspiration for your bathroom Renovation?

This bathroom glass splashback ideas to give your bathroom a full new look and feel:

  1. Mirror-Finish Glass Splashbacks:

Mirrored glass splashbacks serve two purposes; in addition to serving as a regular mirror, they also offer the splashback’s protective qualities because they cover a larger area than a usual mirror. The reflective properties of a mirror-finish glass splashback also make the bathroom appear much brighter and more spacious due to the optical illusion.


  1. Coloured Glass Splashbacks:

By far the most popular option for glass splashbacks, colored glass splashbacks are available in endless color choices. From the standard black and grey splashbacks to white, rose-gold, and pinks for soft aesthetics, blue and metallic colors for those looking for something different, too unique custom colors, Glass splashbacks can be painted to any shade of your requirement. To jazz things up, even more, you can also opt for a combination of colored. And mirrored glass splashbacks either on the same wall or in different sections of your bathroom for variety and contrast.

Glass Splashback


  1. Custom-Designed Glass Splashbacks

A custom Glass Splashback design may be the solution for you if you’re looking for something unique. Be it a unique 2-color paint feature piece with text, ribbons, or accent lines or a fully customized printed image or pattern. With a unique signature bathroom, Glass Splashback made to your distinct tastes and needs, you can express your uniqueness.

Glass Splashback


  1. Bathroom Wall Art

Another best reason to choose a bathroom Glass Splashback is that it also serves as durable, water-resistant wall decor that will instantly brighten your bathroom walls.

Glass Splashback

  1. Easy To Clean

Bathroom splashback materials are normally very simple to wash down, clean, and maintain in general. As point 3 mentions, splashbacks are effective at preventing water stains on your bathroom walls meaning that overall they are a good choice for those who want an easier bathroom to keep clean.

Glass Splashback

A particularly useful decorative feature to have in your bathroom where the humidity. And moisture would usually prohibit paintings and posters. Now you can enjoy your favorite print or piece of graphic art while taking a bath. And getting ready for the day to begin.

Any high-resolution images and photos can be digitally printed into Glass Splashbacks using the most recent UV glass printing technology.

Don’t hesitate to Contact Us:

If you’re looking for splashbacks for bathroom renovation, kitchen, or other renovation purposes then contact us.

Economy Glass offers a range of products for all your glass needs.

We Create Custom Cut Windows, Mirrors, Splashbacks, and Tabletops. So, Our Frameless Glass Is Ideal For A Unique Set of Applications, Including Balustrades, Shower Doors, And Pool Fencing.

We deliver everywhere in the western suburbs of Melbourne and provide custom glass for residential. And commercial customers of Hopper’s Cross, Point Cook or Werribee, and the surrounding suburbs.

Whether you’re a resident, school, builder, interior designer, or architect, we have the solutions you’re looking for.


A Simple Glass Cleaning Trick for Really Grimey Glass


When it comes to glass features in your homes like window glass and sliding doors, especially with the surfaces that face the outdoors, let’s face it, they can get really dirty. All the dirt particles and pollutants in the air can start to take up residence on your beautiful glass. The grease and debris that can end up on your glass splashback in the kitchen and the mineral buildup and soap scum on your frameless glass shower can also become frustrating problems.

When you find you have really dirty glass, you have two problems. One, you aren’t getting the clarity and beauty your home’s glass products should provide. And two – you have a rather tough cleaning job on your hands!

To make your life easier – and to help you enjoy that crystal clear you should see with your windows, shower screens, and other features – here’s a simple glass cleaning trick you can use to achieve fantastic results.

Start with the Right Glass Cleaning Supplies

In order to do Simple Glass Cleaning and remove all that grit and grime, we recommend using a good-quality scouring pad. We have specially formulated polishing pads that we use on glass surfaces before applying an EnduroShield treatment, which is used to protect glass surfaces from buildup. These scouring pads are a little pricier, but they do the job well when your goal is to get rid of every little speck of dirt and buildup on the glass.

You can use a similar product or any other high-quality polishing pad – the ones we use are made from fine steel wool, and they are designed for glass surfaces. The reason they’re so effective is they help you get a thorough clean, but they aren’t too abrasive for glass surfaces as long as you don’t use harsh scrubbing. Make sure you don’t use something that will scratch your glass! You can also use quality cleaning rag. Just make sure you are using a clean, lint-free sponge, cleaning pad, or rag.

Next, you just want to use a good glass cleaner. It’s better to avoid harsh, chemical-heavy cleaning products, but what you do want is a product that will get really soapy and wet on the glass surface when you spray it on. This lubrication will help to draw up all the dirt and muck. It will also stop your scouring pad or rag from scratching the glass with the grit that you’re trying to remove. We use a citrus-based glass cleaner, but you can also use a truck wash or any other similar product.

Easy Steps to Achieve Beautifully Clean Glass

Now, it’s time to work our magic.

  • First, wash the glass with fresh water to rinse off any surface dirt.
  • Next, spray the glass with your glass cleaner. You can use a generous amount – remember, you want that nice wet and lubricated surface.
  • Now, take your scouring pad and lightly go over the glass, trying to polish away all the dirt and grime. To do this, use a simple, circular movement, making circles all the way from the top and working your way to the bottom.

The trick is to make sure you use this circular motion over the entire glass surface. This way, you won’t miss any spots. Also, you don’t want to apply a lot of pressure – just a consistent, gentle pressure for your scrubbing motion.

When you do this, you can usually hear the muck and residue lifting off the glass. Be sure to make sure the pad you are using is not scratching the glass though! You’ll also notice a nice foam building up over the surface where you’ve scrubbed. This lets you know you’ve cleaned the glass in its entirety.

Now, you’re ready to clear off all your cleaning product and reveal that sparkling glass underneath. To do this, take a basic household squeegee. This is a much softer sponge that will help to soak up all the moisture and cleaning product.

Start at the top and wipe across the glass, removing all your residue. Do this same step all the way to the bottom, starting at one side and wiping across. That’s all there is to it! You can clean the glass with some fresh water, and the job’s done.

This is a really Simple Glass Cleaning way to deal with even the toughest glass cleaning jobs. It’s great for glass windows, sliding doors, and other glass features that are regularly exposed to muck and dirt.

What about Routine Glass Cleaning – Do I Need to Use the Glass Cleaning Trick?

This Simple Glass Cleaning trick is perfect for glass that needs a lot of tender loving care. With glass surfaces in the home that don’t see a lot of dirt, like mirrors and balustrading, or for window and shower screen glass that doesn’t look particularly dirty, you don’t need to use the scouring pad and the squeegee, nor do you need to wash the glass off with fresh water to get started. You can simply spray with a gentle glass cleaner and then use the same circular motion with a clean rag, such as a detail rag. Then, instead of wiping away the product and residue with a squeegee, use a clean microfibre cloth to soak up any moisture and buff the glass.

What if I Can’t Get My Glass Fully Clean?

The thing about glass is that when it’s clean, it will always look like new. If your glass looks mucky or discolored even after you clean it, it may have some intensive buildup on the surface. If you find that you have soap scum or other stains that you simply can’t get rid of, don’t hesitate to give us a call. We have a few other glass cleaning tricks up our sleeves!


CTA-Frameless-Glass

How the Experts Clean Glass

Keeping the glass in your home flawlessly clean will help you get the most out of all your beautiful glass surfaces. Fortunately, residential glass products tend to require minimal maintenance, but you’ll still want to keep your glass dirt and smudge-free so you can enjoy them. From glass mirrors to splashbacks and balustrading, here’s a detailed look at how to clean glass like an expert.

What You Need to Keep the Glass in Your Home Looking Spotless

There’s nothing more stunning – or more serene – than clean glass. Without any smudges or accumulated dust and grime, your home’s glass features can interact with the light the way you want them to, whether you’re after a brilliant reflective surface for your glass mirrors or the minimalist aesthetic of crystal-clear glass balustrades and shower doors.

When I or my team experts clean glass, we like to have specific tools to ensure a perfect finish. After all, when it comes to experts’ clean glass, subpar doesn’t cut it because even a minor smudge or mark can stand out, ruining the pristine feel of the glass.

Working with different types of glass and glass cleaning supplies over the years, we can say for sure that the quality of your cleaning materials matters. We like to use high-quality cleaning rags and a premium citrus-based glass cleaner that we’ve found to be really effective.

  • Glass cleaning rags – We use two different rags. The first is a general detail rag and the second is a microfibre cloth.
  • Glass cleaner – Our glass cleaner of choice is a simple housemade blend of water and a citrus-based product.

5 Steps to Cleaning Your Glass Like a Pro

With these steps, you’ll be able to achieve an outstanding finish with every type of glass you own. You can use the same process whether you’re working with glass table tops, bathroom mirrors, glass pool fencing, or anything else – this process works well for both indoor and outdoor glass features.

1. Apply a generous amount of glass cleaner to the glass. The goal is to completely cover the surface. If you’re worried your glass cleaner is going to run onto the flooring, your mirror frame, or another surface, you can cover it before cleaning.

2. Let the glass cleaner sit for at least 10 seconds, although 30 seconds or even a little longer is better. As the glass cleaner sits on the surface, it will lubricate the glass and slowly start to remove any accumulated grime.

3. Lubricate your first cleaning rags – the detailing cloth – by spraying some of your glass cleaners on them. This will create a smooth surface that makes it easy to remove spots on the glass.

4. Take your lubricated cleaning rags and start wiping across the surface, cleaning from side to side. Keep doing this until every part of the glass is cleaned – you really want to make sure you don’t miss any spots. These rags aren’t the best at sucking up all the excess moisture and residue that’s left from your cleaning product, but this isn’t their job anyway. The next step – the secret trick glass experts use – will take care of the residue.

5. Next, use your dry microfibre cloth and wipe all the remaining residue off the glass. To do this, start at the top and then buff the glass in a circular motion. Work your way all the way down to the bottom with the same circular technique. As you buff the glass, you’re picking up any leftover moisture and you’re getting the glass completely spot-free. It’s this step that creates that desired sparkling clean look.

Experts Clean Glass Tips

Here are some pro tips that can help to make cleaning your glass even easier.

It’s really important to use the right cleaner to help you get that streak-free finish. Some cheap glass cleaners can leave you with unwanted streaks. A cleaner with a citrus or vinegar base will help to keep your glass streak-free.

Make sure you’re using a new, clean microfibre cloth when you buff your glass. When you wipe the glass with a circular motion pick up any leftover glass cleaner residue. If there is any dust or grime on your microfibre cloth, you’ll end up depositing it onto your freshly cleaned glass!

Once you’re done, you can look at the glass from a 45-degree angle to make sure you didn’t leave any streaks or marks. From this angle, you’ll see extra light on the glass, which can help to illuminate any remaining spots or streaks. If you do notice anything, you can simply spray the spot, and follow the same process, wiping first with the detailing rag and then buffing with a clean microfibre cloth in a circular motion.

How Often Should You Clean Your Glass?

You can clean the glass in your home as often as you’d like. One of the advantages of glass is that it’s incredibly long-lasting. And it ages well unlike other materials like timber and some synthetics. You won’t harm it if you want to clean it all the time.

On the other hand, internal glass products don’t need to clean frequently. Features like balustrading and living room mirrors often stay clean for longer periods of time. As a rule of thumb, you can clean glass as part of your normal house cleaning routine, or even less if you don’t notice any marks on the glass. For glass that’s more heavily used or that’s vulnerable to accumulating dust, like kitchen splashbacks, bathroom mirrors, and glass table tops, you may want to clean more frequently.

Outdoor glass features like pool fencing can benefit from a more aggressive cleaning schedule as they have more potential for dirt and smudging. Now that you know how professional glaziers clean their glass products, you can keep all the glass in your home eye-catching clean! The best part is, you can restore that pristine, like-new aesthetic in just a few minutes …now if only cleaning the stove was that simple


CTA-Frameless-Glass

EnduroShield Easy Clean Glass Coating

https://youtu.be/-f1AB1loRfs

Are you tired of your shower screen looking dirty no matter how much effort and cleaning materials you put into getting it clean? If you are, we have a glass coating product that can help you out. Our product called EnduroShield, and in this article. I’m going to tell you about its high-performance coating work. How you can cut your cleaning time in half, and reduce elbow grease exponentially.

Daily, we get queries on how to clean the glass properly and what products to use; our answer is always the same. We use a basic glass coating that we’ve been using for years because many tests found it to be the best product.

So what’s our ticket to the easy life and keeping your glass clean? ENDUROSHIELD.

Enduroshield is a High-performance Nanocoating protective layer that we apply to the glass surface.

Once the EnduroShield glass coating applied to the glass, it is incredibly easy to clean. It is not a never-clean product, it just makes cleaning much easier than it is without it.

EnduroShield an easy clean coating for glass that repels dirt and grime. This means that once the coating put on a glass surface. It makes it 10x easier to clean and reduces cleaning time by 90%.

All you need to clean a glass surface protected by EnduroShield is a hot, soapy sponge, some fresh water, and a squeegee. And your glass will stay good as new for at least 10 years. All it costs is a couple of hundred dollars to get 10 years’ worth of protection for your shower screen. Now this is a deal you shouldn’t pass up.

I’ve focused on shower screens in this article, but EnduroShield can use for a wide range of glass, ceramic, porcelain tile, grout, stainless steel, and chrome surfaces. If you think you’ll need it for your next glass project, don’t hesitate to contact us.


CTA-Frameless-Glass